- FilmDev
- Usage
Usage

First off, please note that this module emulates many aspects of photographic film, including its shortcomings. These shortcomings include photographic film's tendency to "bloat" stellar profiles. If your goal is to achieve a non-linear stretch that shows as much detail as possible, the far more advanced AutoDev will always do an objectively better job for that purpose. Please note that the edge-enhancing qualities of photographic film are not emulated by this module, as this step is best done through other means.
Enhancements over the classic Digital Development algorithm (Okano, 1997), are the introduction of an additional gamma correction component, the removal of the edge enhancement component, and the introduction of automated black and white point detection. The latter ensures your signal never clips, while making histogram checking a thing of the past.
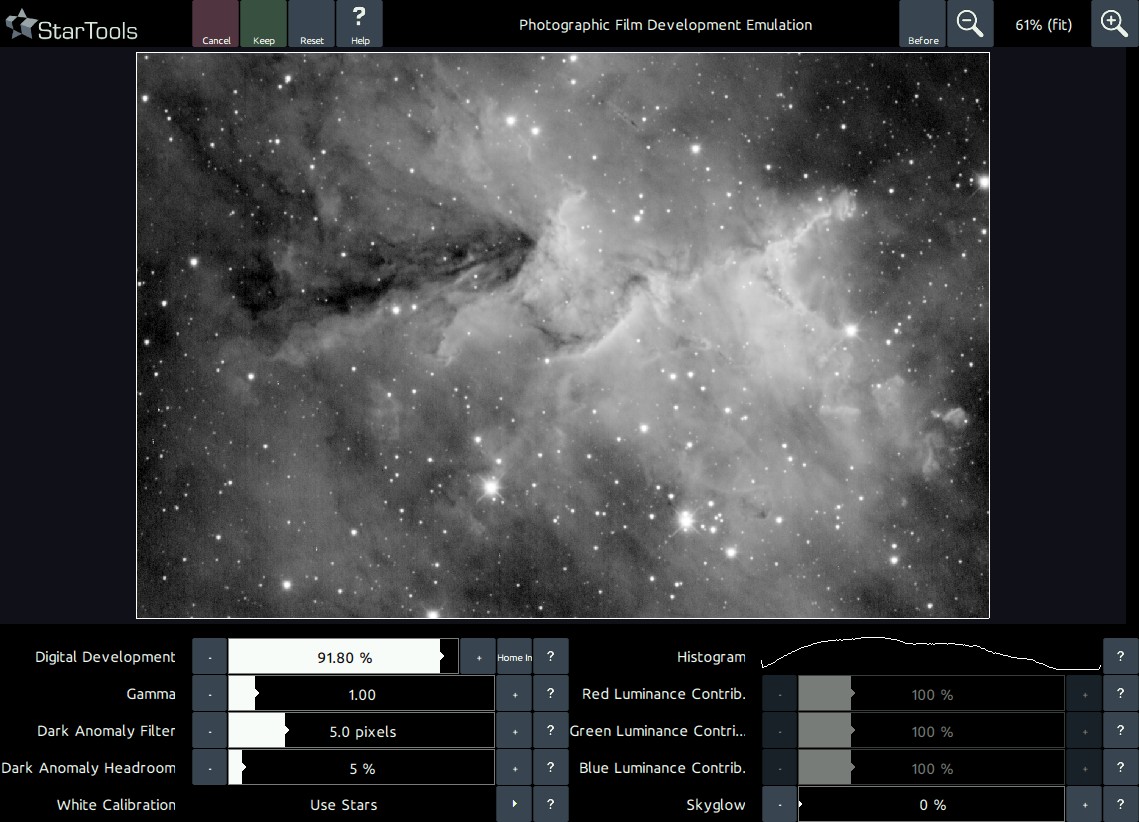
Central to the module, is the 'Digital Development' parameter, which controls the strength of the development and resulting stretch.
Central to the module, is the 'Digital Development' parameter, which controls the strength of the development and resulting stretch. A semi-automated 'homing in feature' attempts to find the optimal settings that bring out as much detail as possible, while still adhering to the Digital Development curve. This feature can be accessed by clicking on the 'Home In' button until the image does not change much further. A simple 'Gamma' correction can also be applied.
A 'Dark Anomaly Filter' helps the automatic black point detector ignore any dead pixels. Any dead or darker-than-real-background pixels are caught by the filter, they are re-allocated a reduced amount of dynamic range as set by the 'Dark Anomaly Headroom' parameter.
Automatic white point detection ('White Calibration') uses any over-exposing stars oir other highlights in your image, however it can also be switched to use the 'Dark Anomaly Filter' setting to filter out any bright anomalies (e.g. hot pixels) that are not stars or real highlights.
An artificial pedestal value can be introduced through the 'Skyglow' parameter. This parameter specifies how much of the dynamic range (up to 50%) should be taken up by the artificial pedestal.
Finally, a luminance mixer allows for re-mixing of the contribution of each color channel to brightness.
Color retention
Non-linearly stretching an image's RGB components causes its hue and saturation to be similarly stretched and squashed. This is often observable as "washing out" of colouring in the highlights.
Traditionally, image processing software for astrohptography has struggled with this, resorting to kludges like "special" stretching functions (e.g. ArcSinH) or Color enhancement extensions to the DDP algorithm (Okano, 1997) that only attempt to minimize the problem, while still introducing color shifts
While other software continues to struggle with color retention, StarTools Tracking feature allows the Color module to go back in time and completely reconstruct the RGB ratios as recorded, regardless of how the image was stretched.
This is one of the major reasons why running the Color module is preferably run as one of the last steps in your processing flow; it is able to completely negate the effect of any stretching - whether global or local - may have had on the hue and saturation of the image.
Because of this, the digital development color treatment extensions as proposed by Okano (1997) has not been incorporated in the FilmDev module. The two aspects - colour and luminance - of your image are neatly separated thanks to StarTools' signal evolution Tracking engine.
You may also be interested in...
- Wipe: Gradient Removal, Synthetic Flats and Bias correction (under Features & Documentation)
The Wipe module detects, models and removes sources of unwanted light bias, whether introduced in the optical train, camera or by light pollution.
- Interface (under Introduction)
Note that the modules will only successfully activate once an image has been loaded, with the exception of the 'Compose' module.
- White balancing in MaxRGB mode (under How to determine a good color balance)
If we see large areas of green, we know that we have too much green in our image and we should adjust the bias accordingly.
- White point reference by mask sampling (under How to determine a good color balance)
To apply the new colour balance to the whole image, launch the Mask editor once more and click Clear, then click Invert to select the whole image.
- Setting a colour balance (under Usage)
The 'Red, Green and Blue Increase/Reduce' parameters are the most important settings in the Color module.
